
Every computer, from the smallest of home theater PCs to the most hulking of gargantuan gaming rigs, generates heat during operation—heat that can kill your PC's precious internals if you're not careful.
While you don't have anything to worry about if you bought your computer from a big-box retailer or straight from a manufacturer like HP, you'll be faced with a potentially crucial decision if you're building (or custom-buying) a fire-breathing, benchmark-eating computer: Should you chill your PC with a traditional air cooling solution or a pricier, yet more efficient liquid-cooling system? That question has many aspects to consider before you can answer it.
Cooling methods explained
The secret to harnessing the cooling power of air lies in fans—lots of fans. Your typical air-cooled PC is packed with case fans, graphics card fans, and a CPU fan or two—positioned atop a big metal heat sink—to keep your expensive components nice and frosty.
A water-cooling system, on the other hand, employs a series of coolant-filled tubes, a radiator, water blocks (the equivalent of heat sinks), and a couple of other components to keep your PC feeling refreshed. You'll even need a few fans to push around all the water! Our guide to setting up a liquid-cooled PC explains a basic (ha!) system in exacting detail.
Got it? Good. Defining air cooling and liquid cooling is the easy part. The trickier bit is making the decision to use one or the other.
Air cooling
One of the great joys of using fans to cool your system is that, in a lot of circumstances, you really don’t have to do anything to create a decent cooling setup. If your system’s chassis is of the non-bargain-bin variety, odds are high that its manufacturer has already installed exactly what you need—namely, an intake fan in the front that pushes outside air over your hard drives and an exhaust fan that shoots hot air flying out of the rear of the chassis.
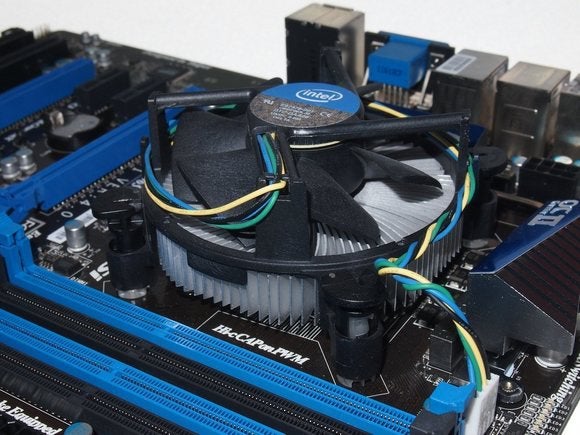
Graphics cards and computer processors pretty much always ship with powerful stock fans—you know, the ones that sound like a plane taking off when they roar into action. Those, combined with case fans, make up the Holy Trifecta of air cooling within a typical desktop PC.
So, the big question remains: Why air? It's cheap, for one thing. Even if you want to go with an aftermarket cooler for your CPU or GPU, you’re going to be paying far less than you would for a liquid cooling setup. The same goes for case fans. You can certainly purchase bigger, better, more efficient fans if you want a quieter rig, or even fans that light up if you’re into that sort of thing. Sure, you'll have to pay for them, but you’ll still spend far less cash upgrading or building a nice air-cooling setup than you will on a typical water-cooling loop.
Also consider the cost to your sanity. It’s a lot easier to use four screws to attach a fan to your case than it is to build your own water cooling setup.
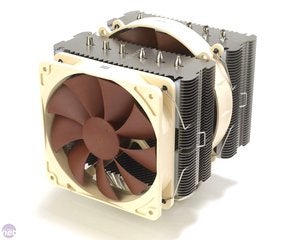
Traditional air cooling has three major downsides, though. First, fans aren't as efficient as water cooling, which can pose a problem with severely overclocked processors or in particularly beefy rigs filled with multiple graphics cards. Second, the heat sinks on powerful CPU coolers can get big. Finally, fans are loud.
Water cooling pros
The act of switching from air to liquid cooling represents a personal milestone in one’s computer-building life. You, young PC Padawan, are now a desktop Jedi.

Let’s start with the pleasant bits. One of the key benefits of a strong liquid cooling setup is that it allows you to cool specific system components to a greater degree than if were you to use fans—not the most applicable setup for someone running a typical stock-clock processor, but one that’s definitely of interest to anyone looking to overclock their chips a bit (or a ton).
Even if you don't tax your rig enough to need a bigger cooling boost, a cheap self-contained water cooling loop—more on those later—can help lower your PC's sound output. Water cooling is much quieter than stuffing your case full of fans.
There's also the issue of space. A huge heat-sink/fan combination might perform well enough, but the best CPU coolers eat up a ton of real estate inside your case. Liquid cooling requires much less space, and it looks a lot niftier to boot. You can't discount the cool factor of a case full of colorful, liquid-filled tubes!
Water cooling cons
One big downside of water cooling is its comparatively high cost, especially if you’re looking to build a custom setup. While most traditional upper-end CPU coolers cost somewhere between $50 and $100, building a liquid-cooling setup can cost far more. For example, EKWaterBlocks' top-tier H3O 360 HFX water cooling kit costs a whopping $360. (The price is converted from euros, so the 360 in the name may be coincidental.)
Quality matters in a liquid-cooling setup: You don’t want to buy cheap parts to save a few bucks and end up dousing your pricey PC components in brightly hued coolant.
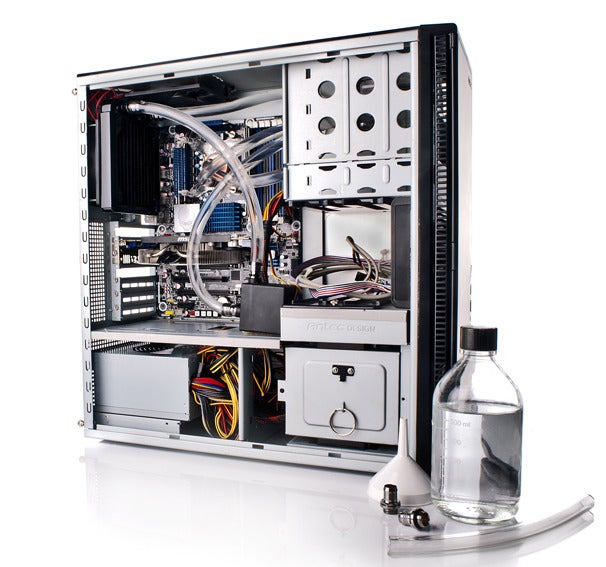
The homework involved is another drawback. Generating the parts list is going to take a little planning if you're not buying a prepackaged kit. You’ll have to pick up a water block for your CPU that fits its socket, fittings that match your block and tubing size, the tubing itself, a pump, a reservoir, a radiator, a fan (or fans) for the radiator, and the coolant itself. And that’s just a typical setup for the most bare-bones configuration you can build. If you want to power separate loops for your video card, motherboard, RAM, or hard drives, you’ll have to do even more planning and purchasing.
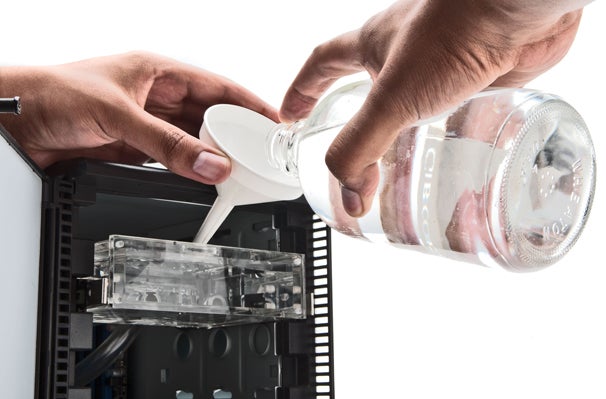
You'll also have to make sure you have room for your setup. Radiators typically require open fan slots on your case. Reservoirs require space in your case as well, and you’ll have to plan out your loop’s layout so that you can actually get it up and running ("priming" the pump, so to speak) when you fill it with coolant. In other words, your water-cooling loop does you no good if you don’t have a good way to get the fluid running around!
Then there’s the installation itself. Simply put, your first adventures in water-cooling land could very well be fraught with peril. Installing loops isn’t exactly newbie-friendly, and the process might be more involved than you’re comfortable with, even if you’ve installed a typical fan-based aftermarket CPU cooler or two.
Which reminds me: Connecting your tubing and fittings in a secure and safe fashion is going to be your number-one issue when building your first water-cooling setup. You willspring a leak in some fashion. You'll want to construct and test your liquid-cooling systemoutside of your PC to ensure its fortitude before installing it around your expensive electronics. Component manufacturers aren't likely to replace flooded electronics, and the manufacturers of your water cooling parts certainly aren’t going to foot the bill.
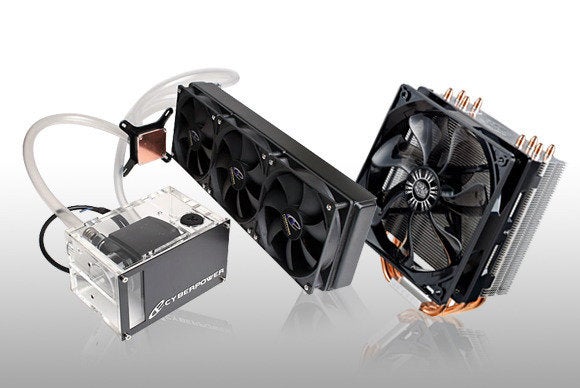
Self-contained liquid coolers
If all this talk of water cooling's complexity has left your head spinning a bit, fear not: Another solution is available.
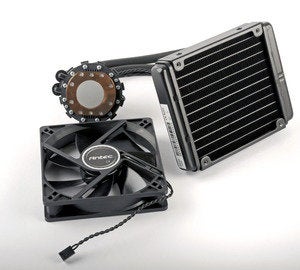
Self-contained or "sealed" liquid-cooling kits—preassembled and completely sealed, they start at around just $60—allow you reap the benefits of a simple water-cooling setup without having to deal with any of the messy particulars. You just need to attach a water block to your CPU and a radiator/fan combination to your case, and you’re off to the races, with nary a drop of coolant to worry about. You may lose customization options if you use self-contained kits like Corsair’s Hydro H-series or NZXT's Kraken-series coolers, but you also lose most of the headaches typically associated with do-it-yourself liquid cooling. Leakage is highly unlikely as long as you don't bend or twist the tubing at sharp, weird angles.
Installing a self-contained liquid-cooling kit is about on a par with the difficulty of installing an aftermarket cooler for your CPU. If you need to water-cool only your overclocked processor, a sealed liquid cooler is a compelling option. Stick to DIY loops if you want to liquid-cool more than the single component, however—or if you want the bling factor of clear tubes filled with colorful coolant. Most sealed coolers are opaque.
Conclusion
So, which is better? Air cooling or water cooling? The answer depends on your particular usage needs.
One size does not fit all when it comes to case cooling, but most people can get by with fans alone. It's easy, and it's cheap. If, on the other hand, you’re an enthusiast who needs the best cooling possible for your flaming CPU and a gaggle of graphics cards, a DIY water-cooling setup is in your future. Finally, try a sealed liquid cooler if you're considering liquid cooling either to keep your overclocked processor chilled or simply to benefit from reduced system noise.
http://www.pcworld.com/article/2028293/liquid-cooling-vs-traditional-cooling-what-you-need-to-know.html
No comments:
Post a Comment